The Appointment Booking System (ABS) is a website where you can book appointments online. Both new and existing patients can book an appointment using ABS. On the website, you can choose which clinic office to visit, select the applicable medical procedure, select a provider, and book a slot according to the provider or room availability.
We will guide you on how to book an appointment in ABS below.
My bad-debt write-offs have been reduced over 90%. Pre–IMS, we had an average of $80,000 per month outstanding in charges waiting for referral. Since implementation of IMS we now regularly maintain no more than $400 per month. The Authorization tracking screen helps us in timely follow-up with the insurance companies. The billing module is great, in a way we now know what ensures timely payments. The aging reports help our billers set priority of follow-ups, making sure we work in the right areas.
Mid Michigan Cardiology Associates
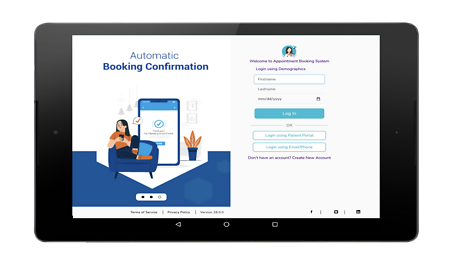
ABS Sign-In Screen
The ABS sign-in page is composed of two parts: the upper pane and the lower pane.
Upper pane. In the upper pane of the sign-in page, you can access the section where you can sign in using your demographic details, Patient Portal credentials, or email or phone credentials. If you do not have an existing account, click Create One or Request One to create or request an account.
Lower pane. In the lower pane, you can view the links to the ABS terms of services, privacy policy, clinic’s social media pages, and web links.
Note: In the right corner of the upper pane, you can click the Language symbol to select your preferred language. You can also point to the Help symbol if you have issues with signing in or signing up for ABS
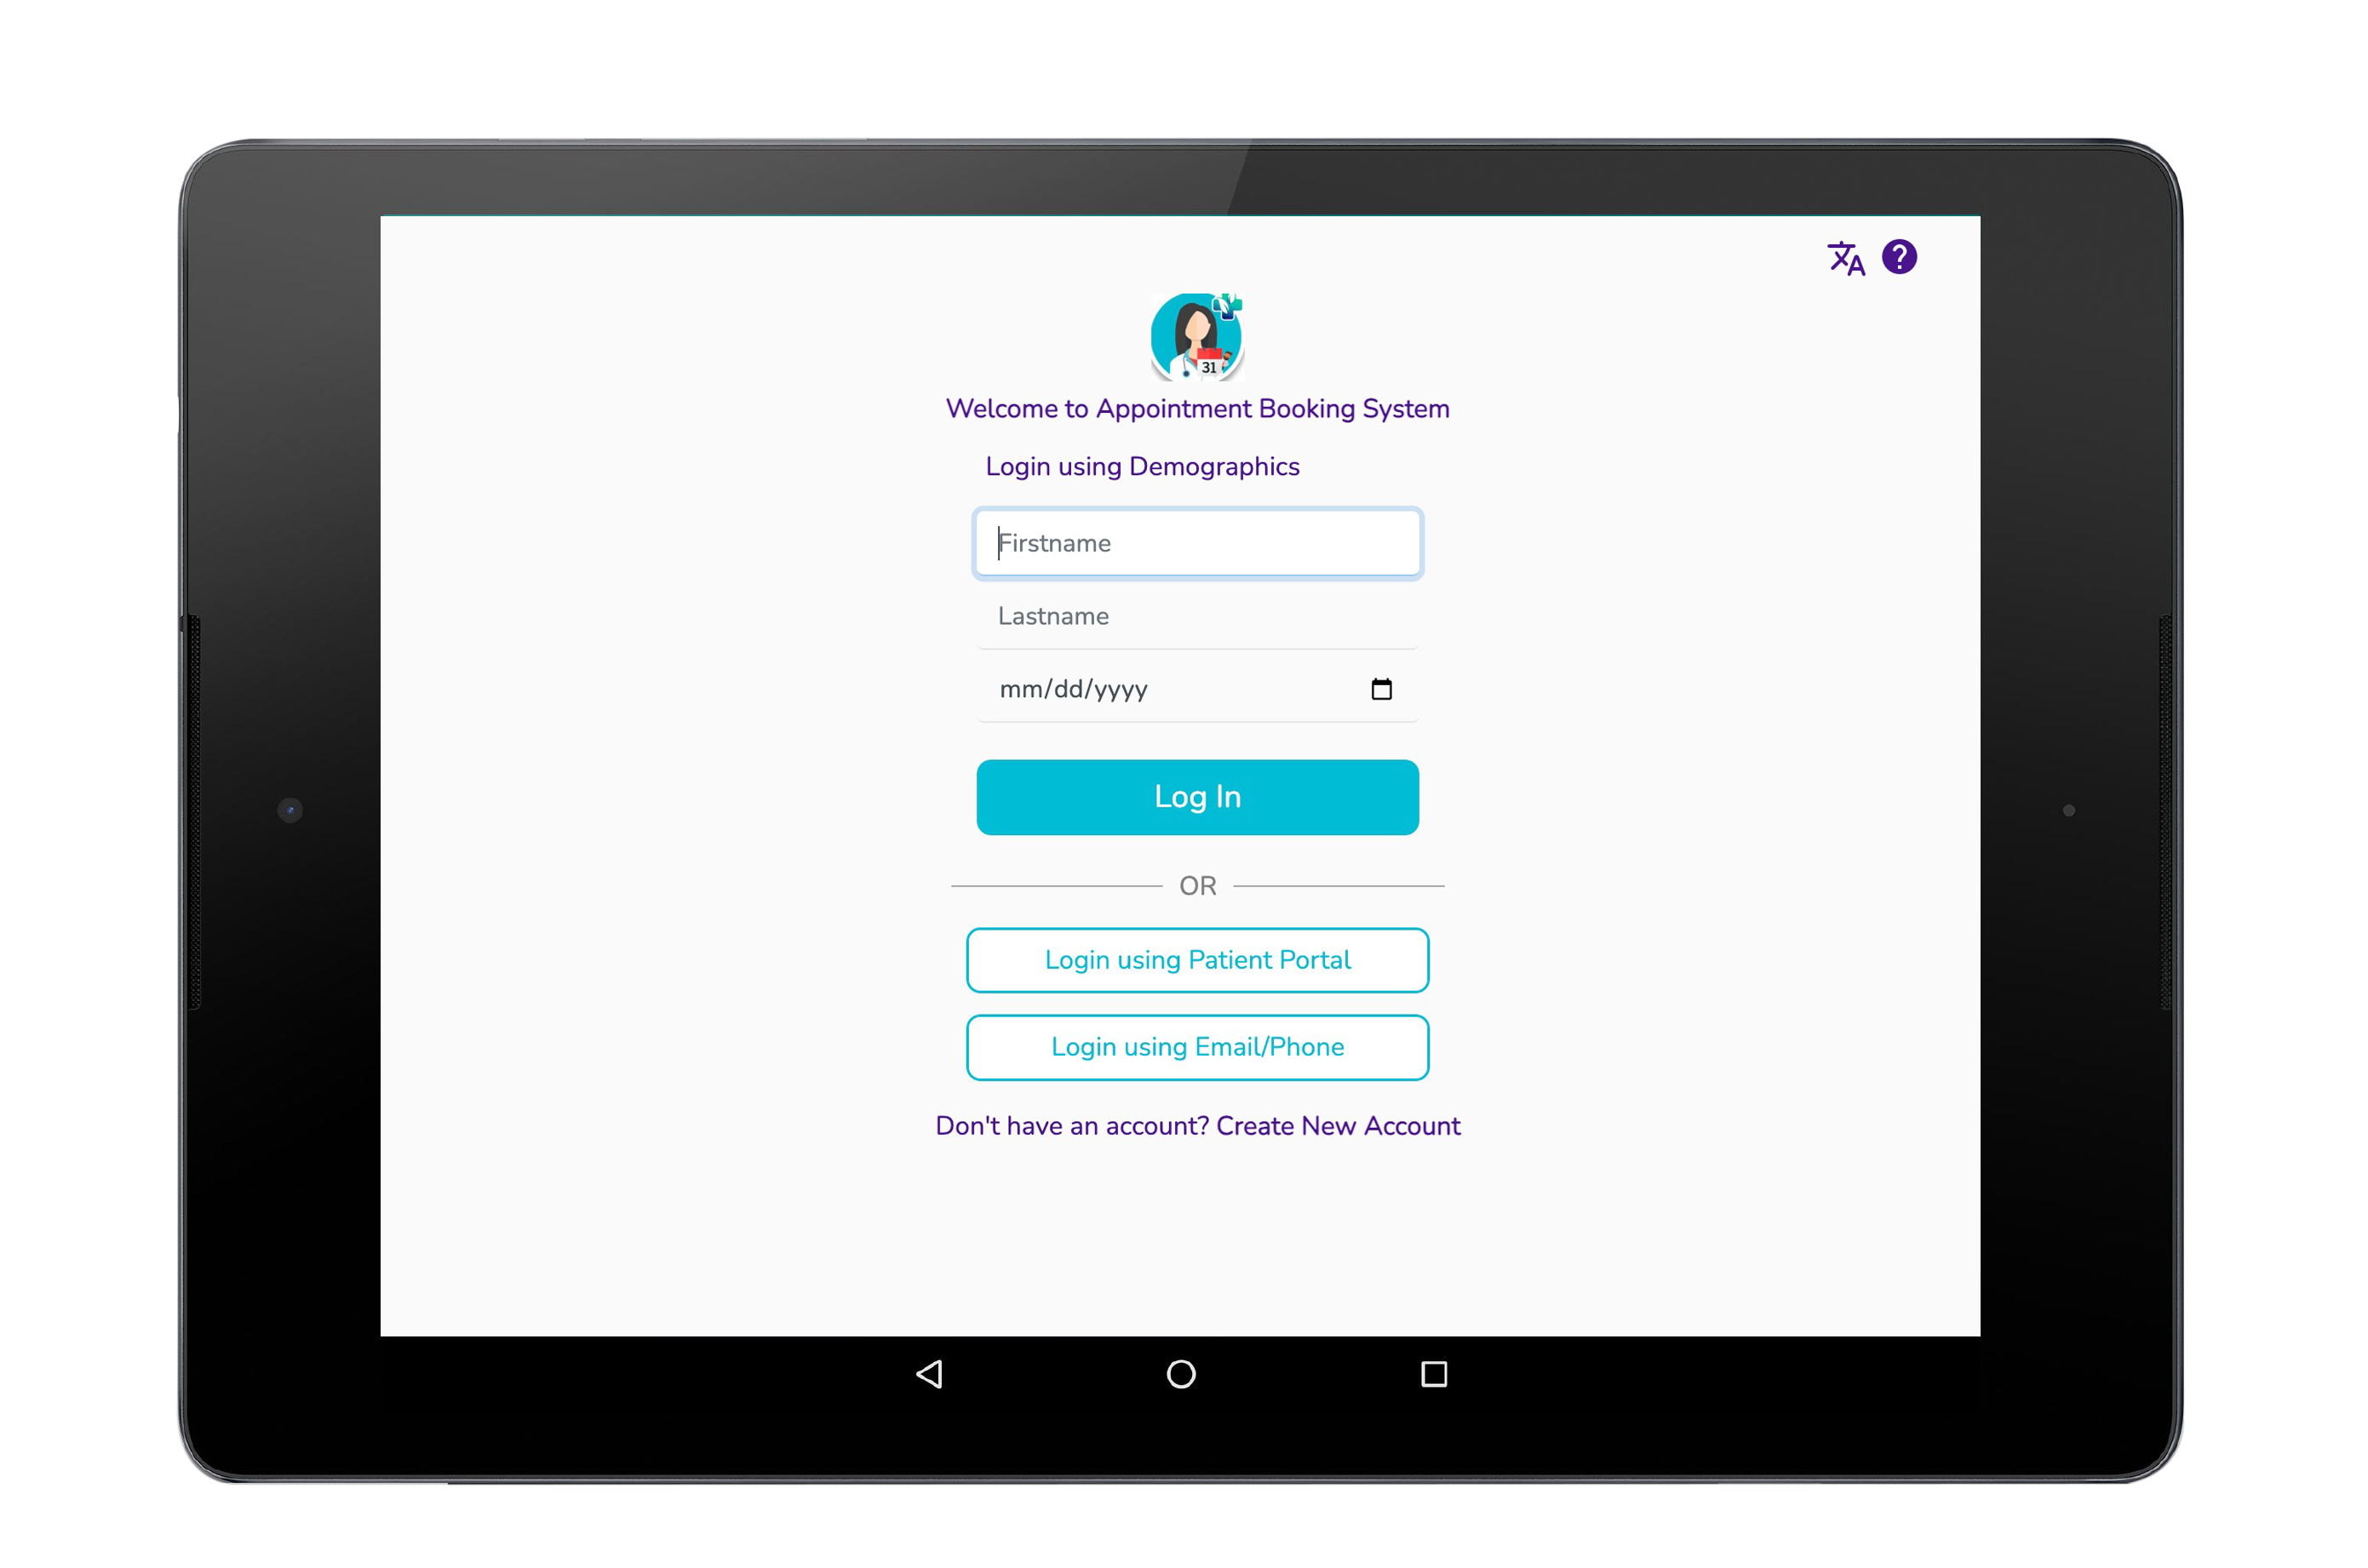
Patient Sign-In or Sign-Up (Method) Screen
For existing patients, you can use any of the three sign-in methods for the verification process:
- Login using Demographics.
- Login using Patient Portal.
- Login using Email/Phone.
Click Login using Demographics to sign in using your first name, last name, and date of birth.
Click Login using Patient Portal to sign in using your IMS Patient Portal credentials.
Click Login using Email/Phone to sign in using your email address or phone number and your date of birth.
For new patients, it is necessary to sign up before booking an appointment On the screen, click Request One or Create One located under the login button
Note:Your clinic may automatically add new patients who book an appointment to their patient list. Because of this, ABS either shows Request One or Create One.
Patient Sign-Up Screen
Enter your email address or phone number, and then click Sign Up.
Note: If you enter a text, ABS detects it as an email address. If you enter a number, ABS detects it as a phone number. If your email address starts with a number, continue typing your email address until ABS recognizes it as an email address. For international patients, enter your international phone number, and then select the applicable country code on the sign-in page
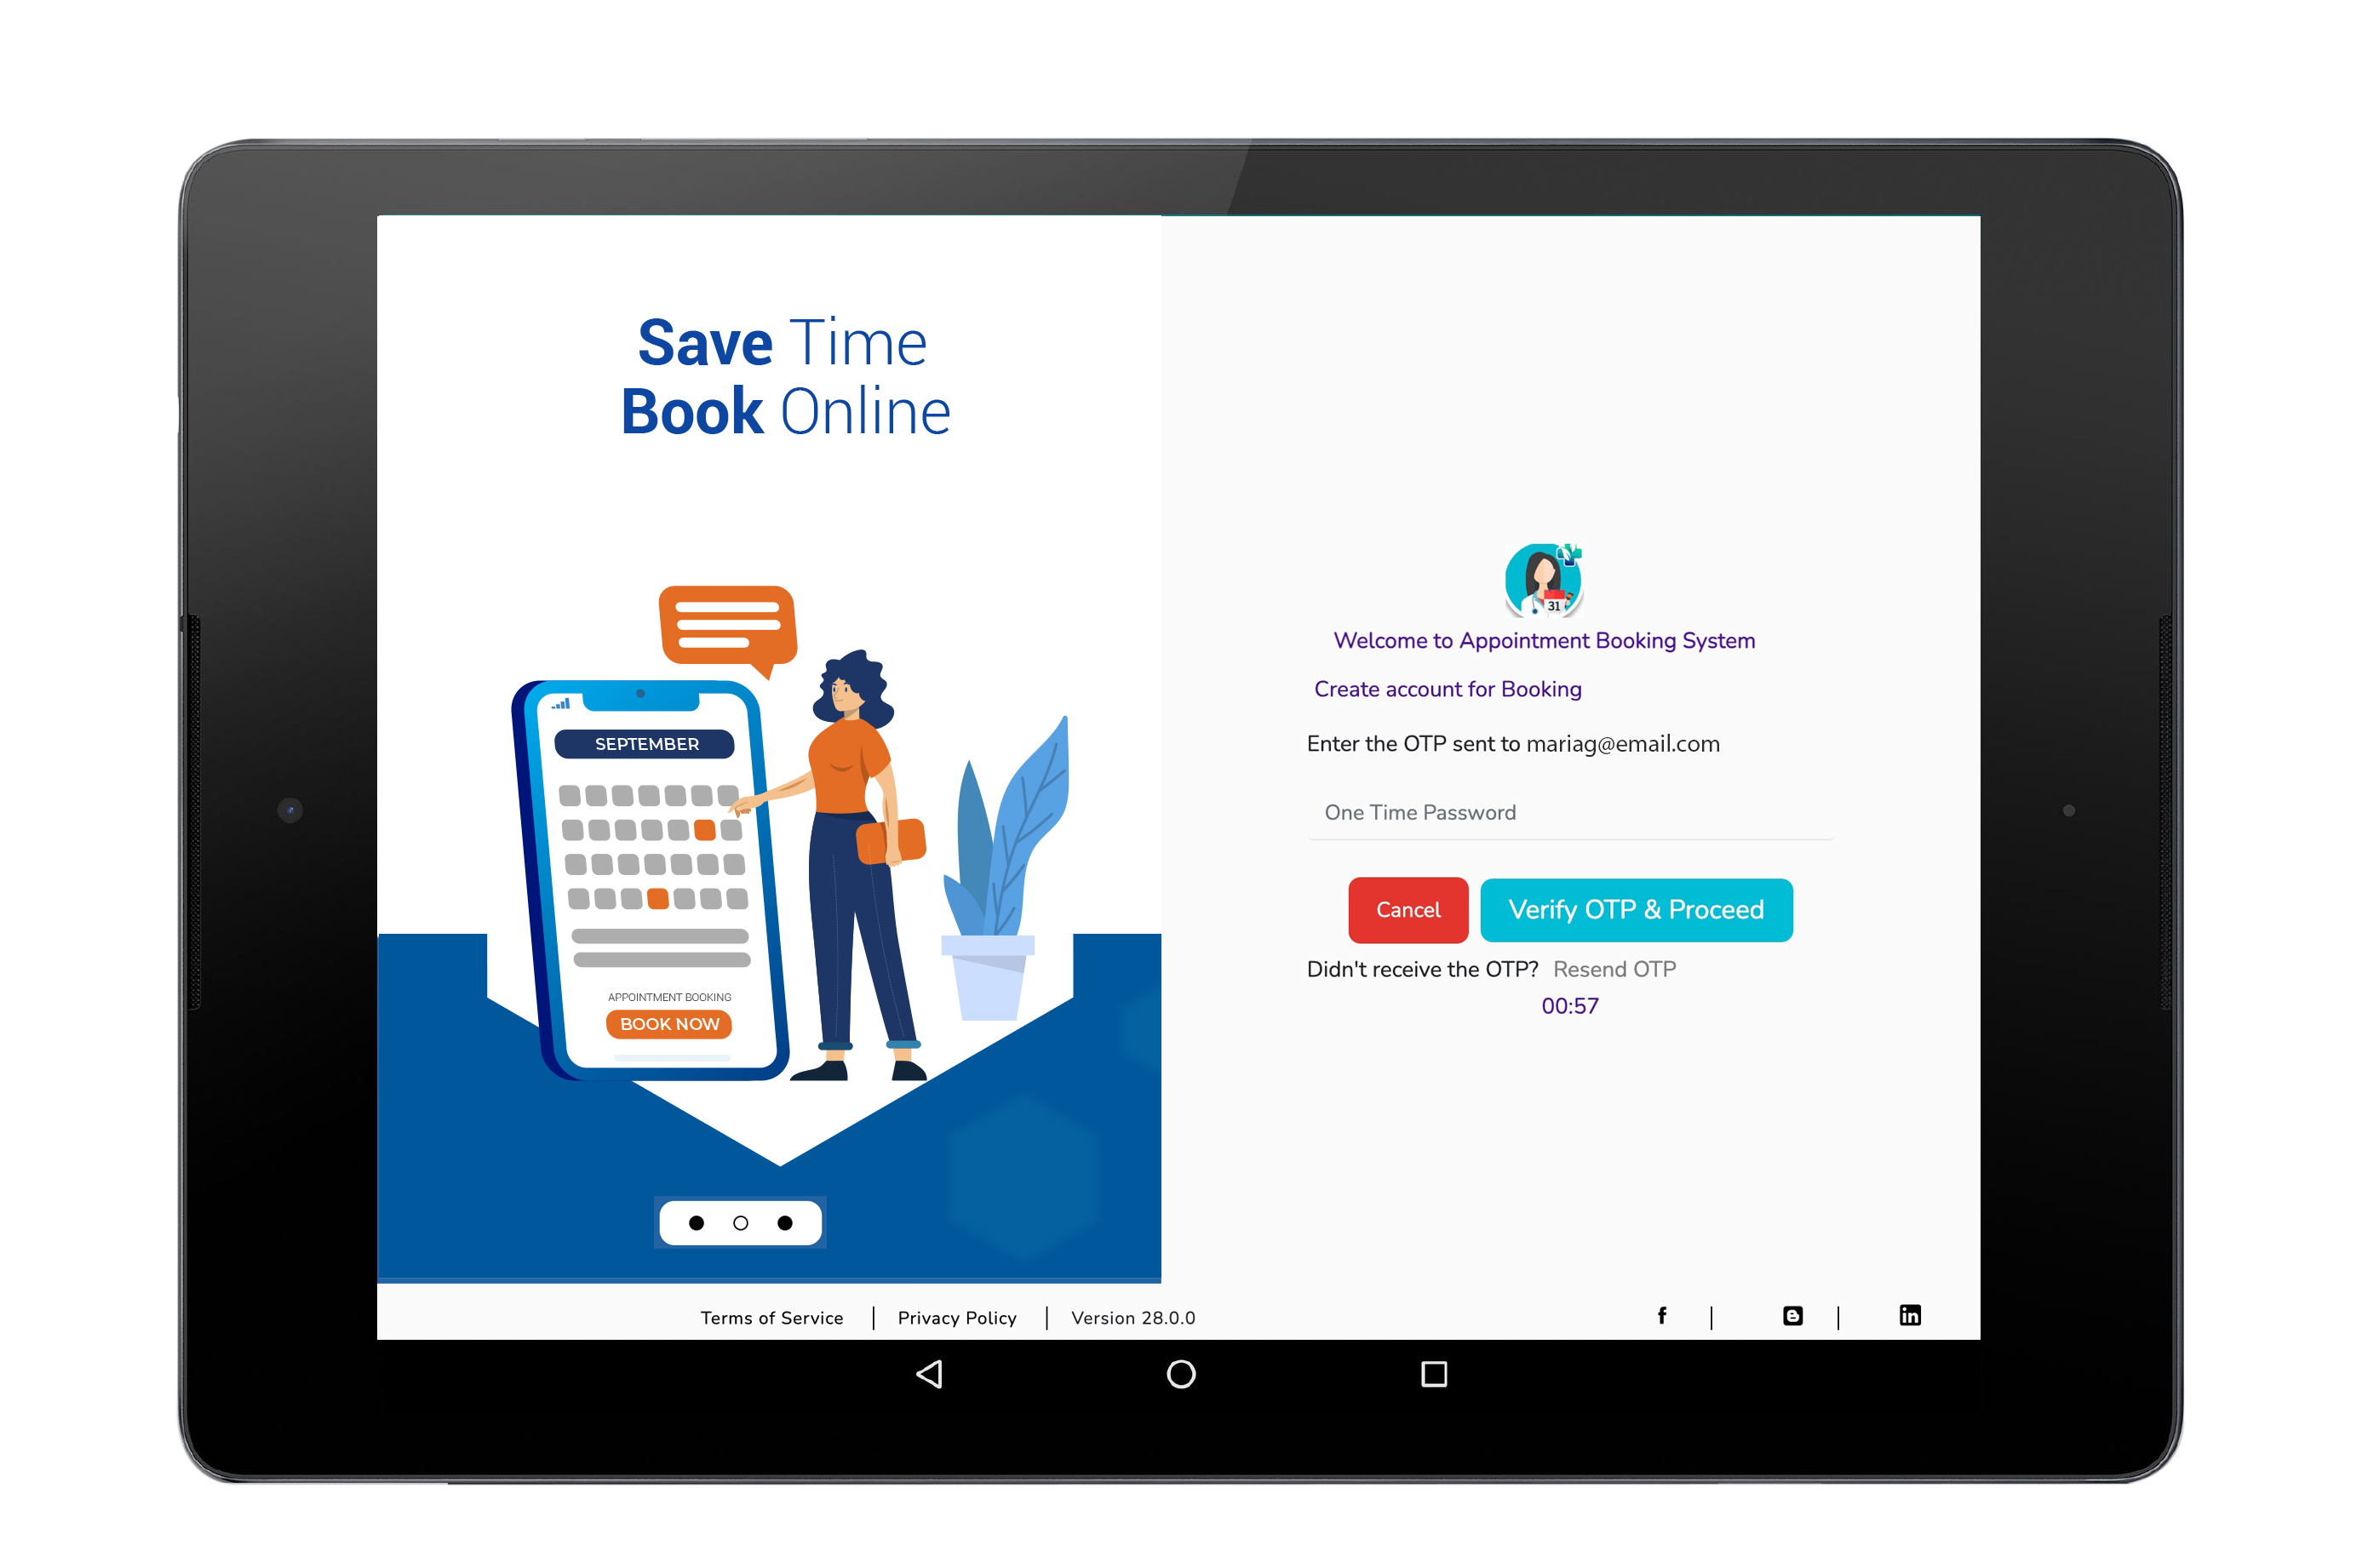
OTP Verification Screen
Enter the one-time password (OTP) sent to the contact information you entered, and then click Verify OTP & Proceed.
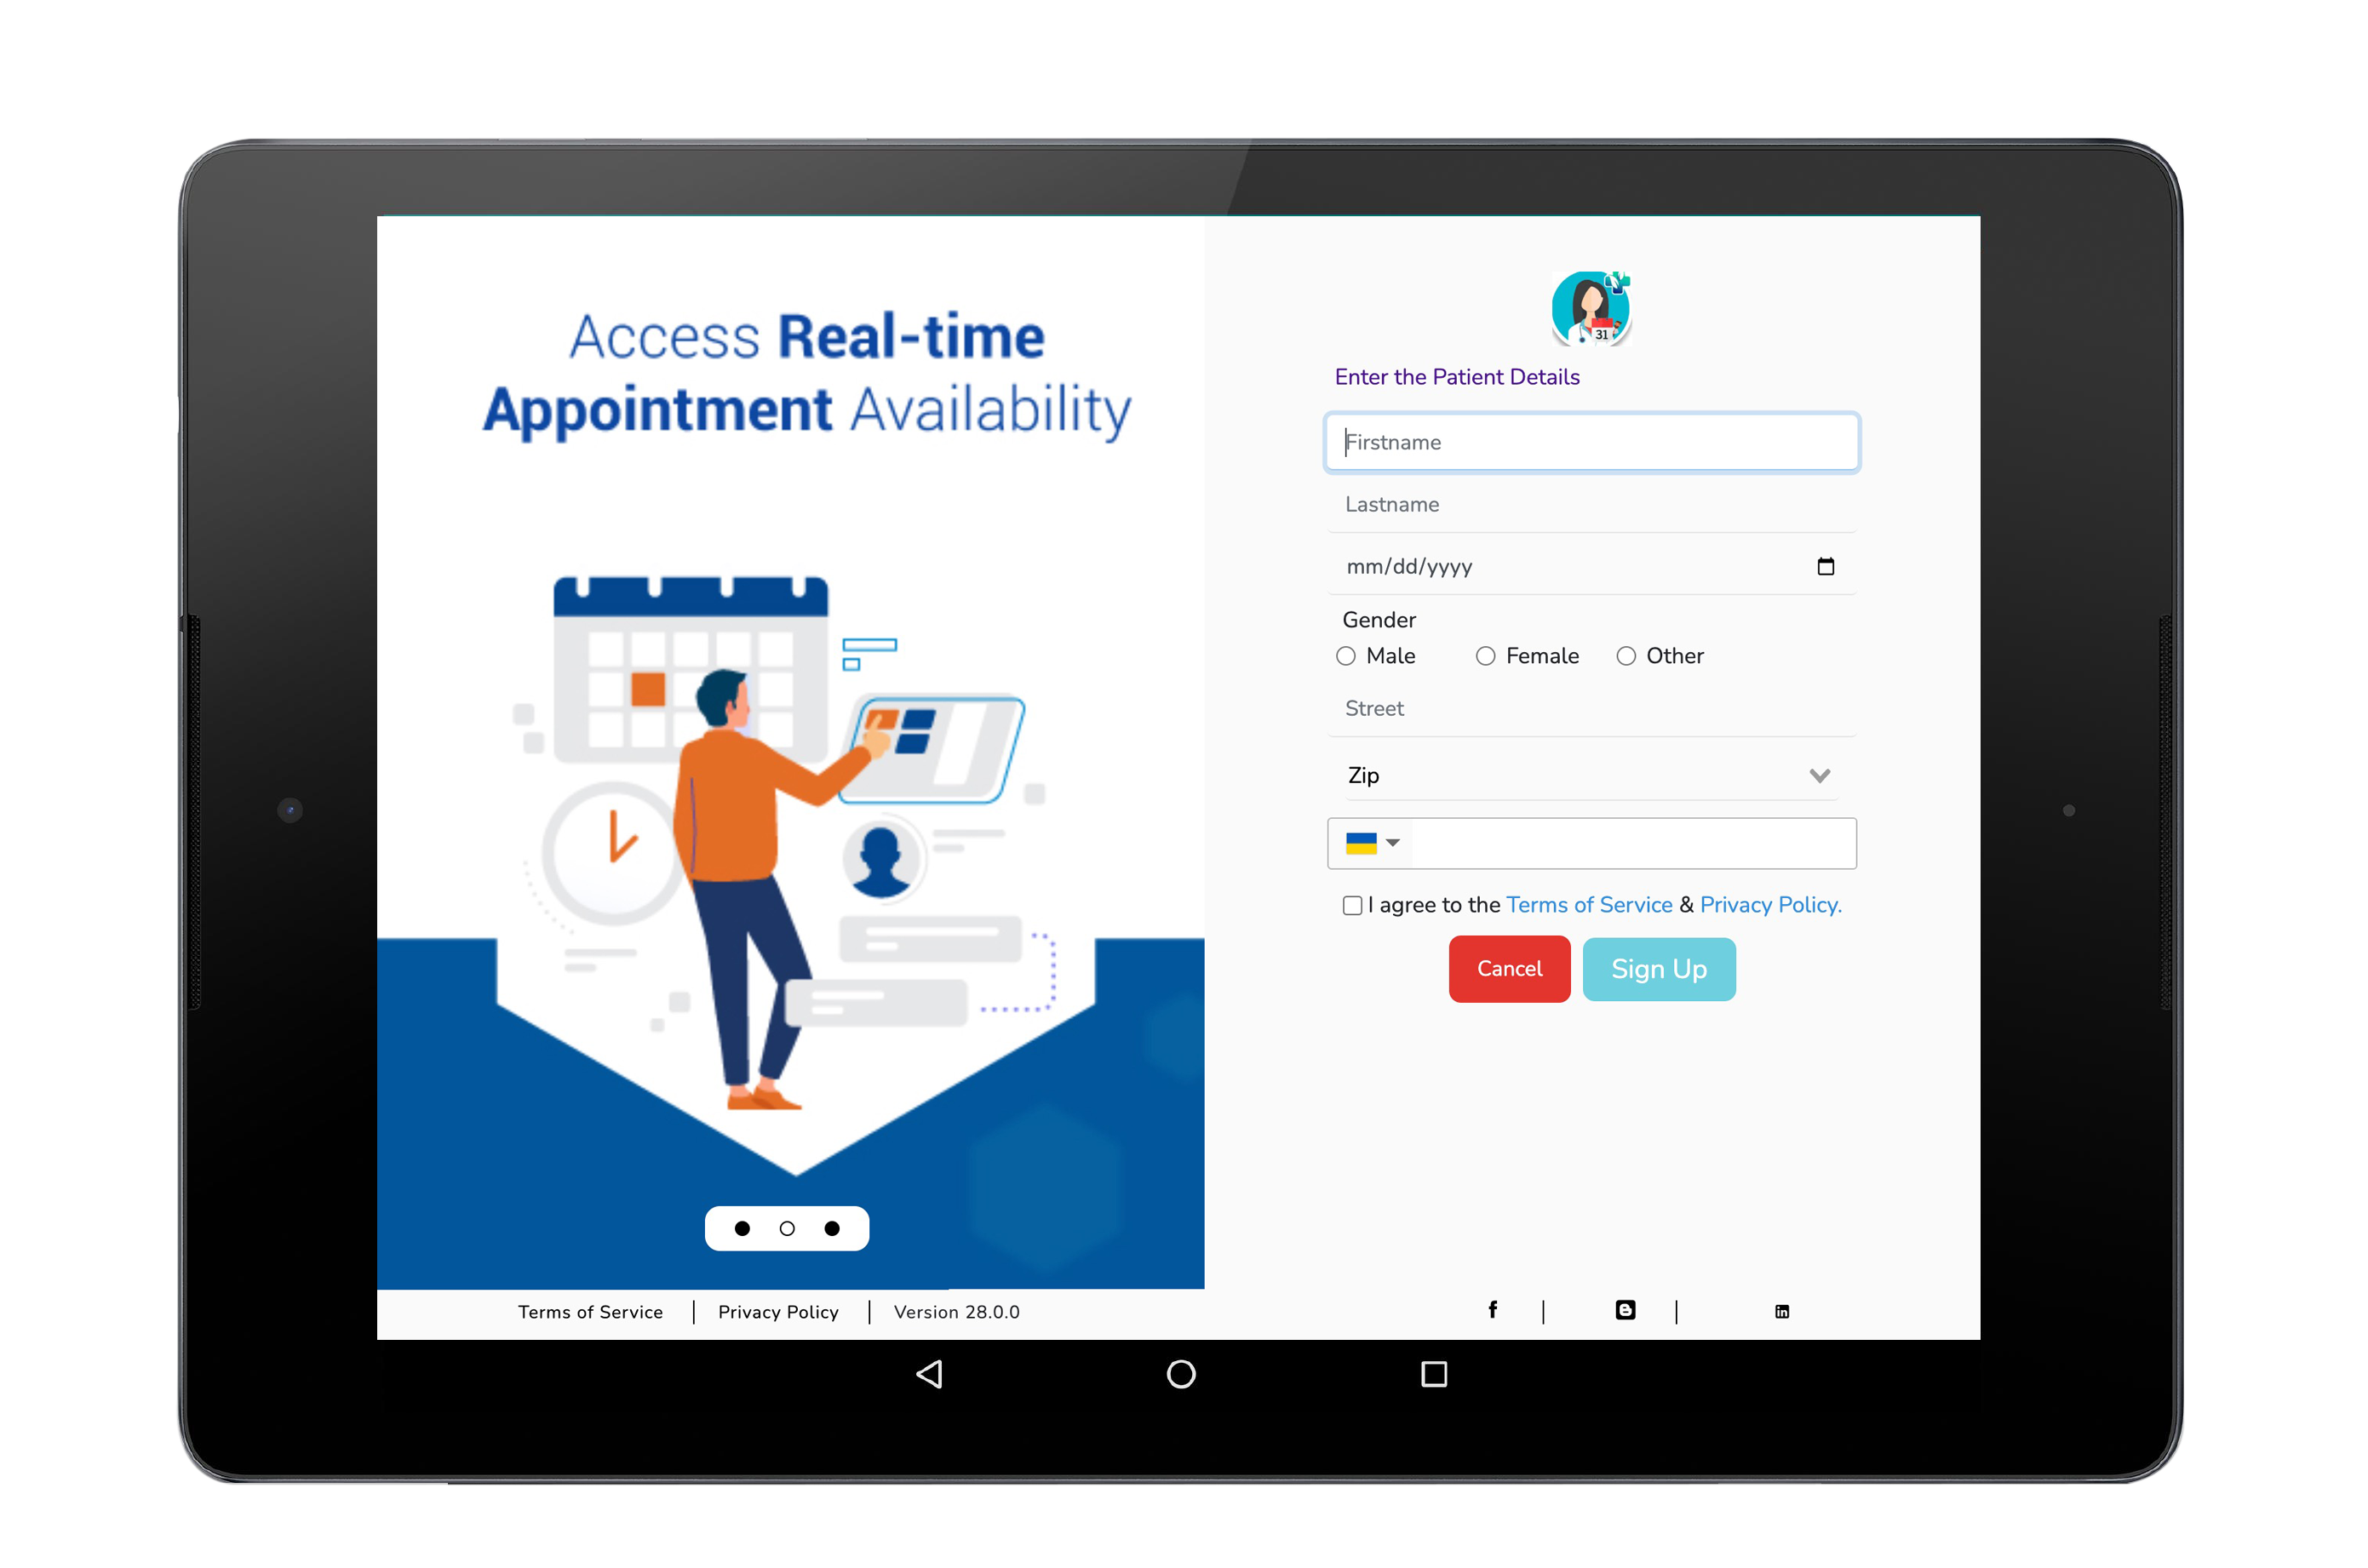
Patient Demographics (Sign-Up) Screen
New patients enter their demographic details.
- Enter your other contact information.
- If you signed up using a US number, enter the first four digits of your postal code, and then select the applicable option from the list. If you signed up using a non-US number, enter your postal code in the ZIP box.
- Select the I agree to the Terms of Service & Privacy Policy check box.
- Click Sign Up
Note: Depending on the contact information that you used during signup, the Phone or Email box becomes optional.
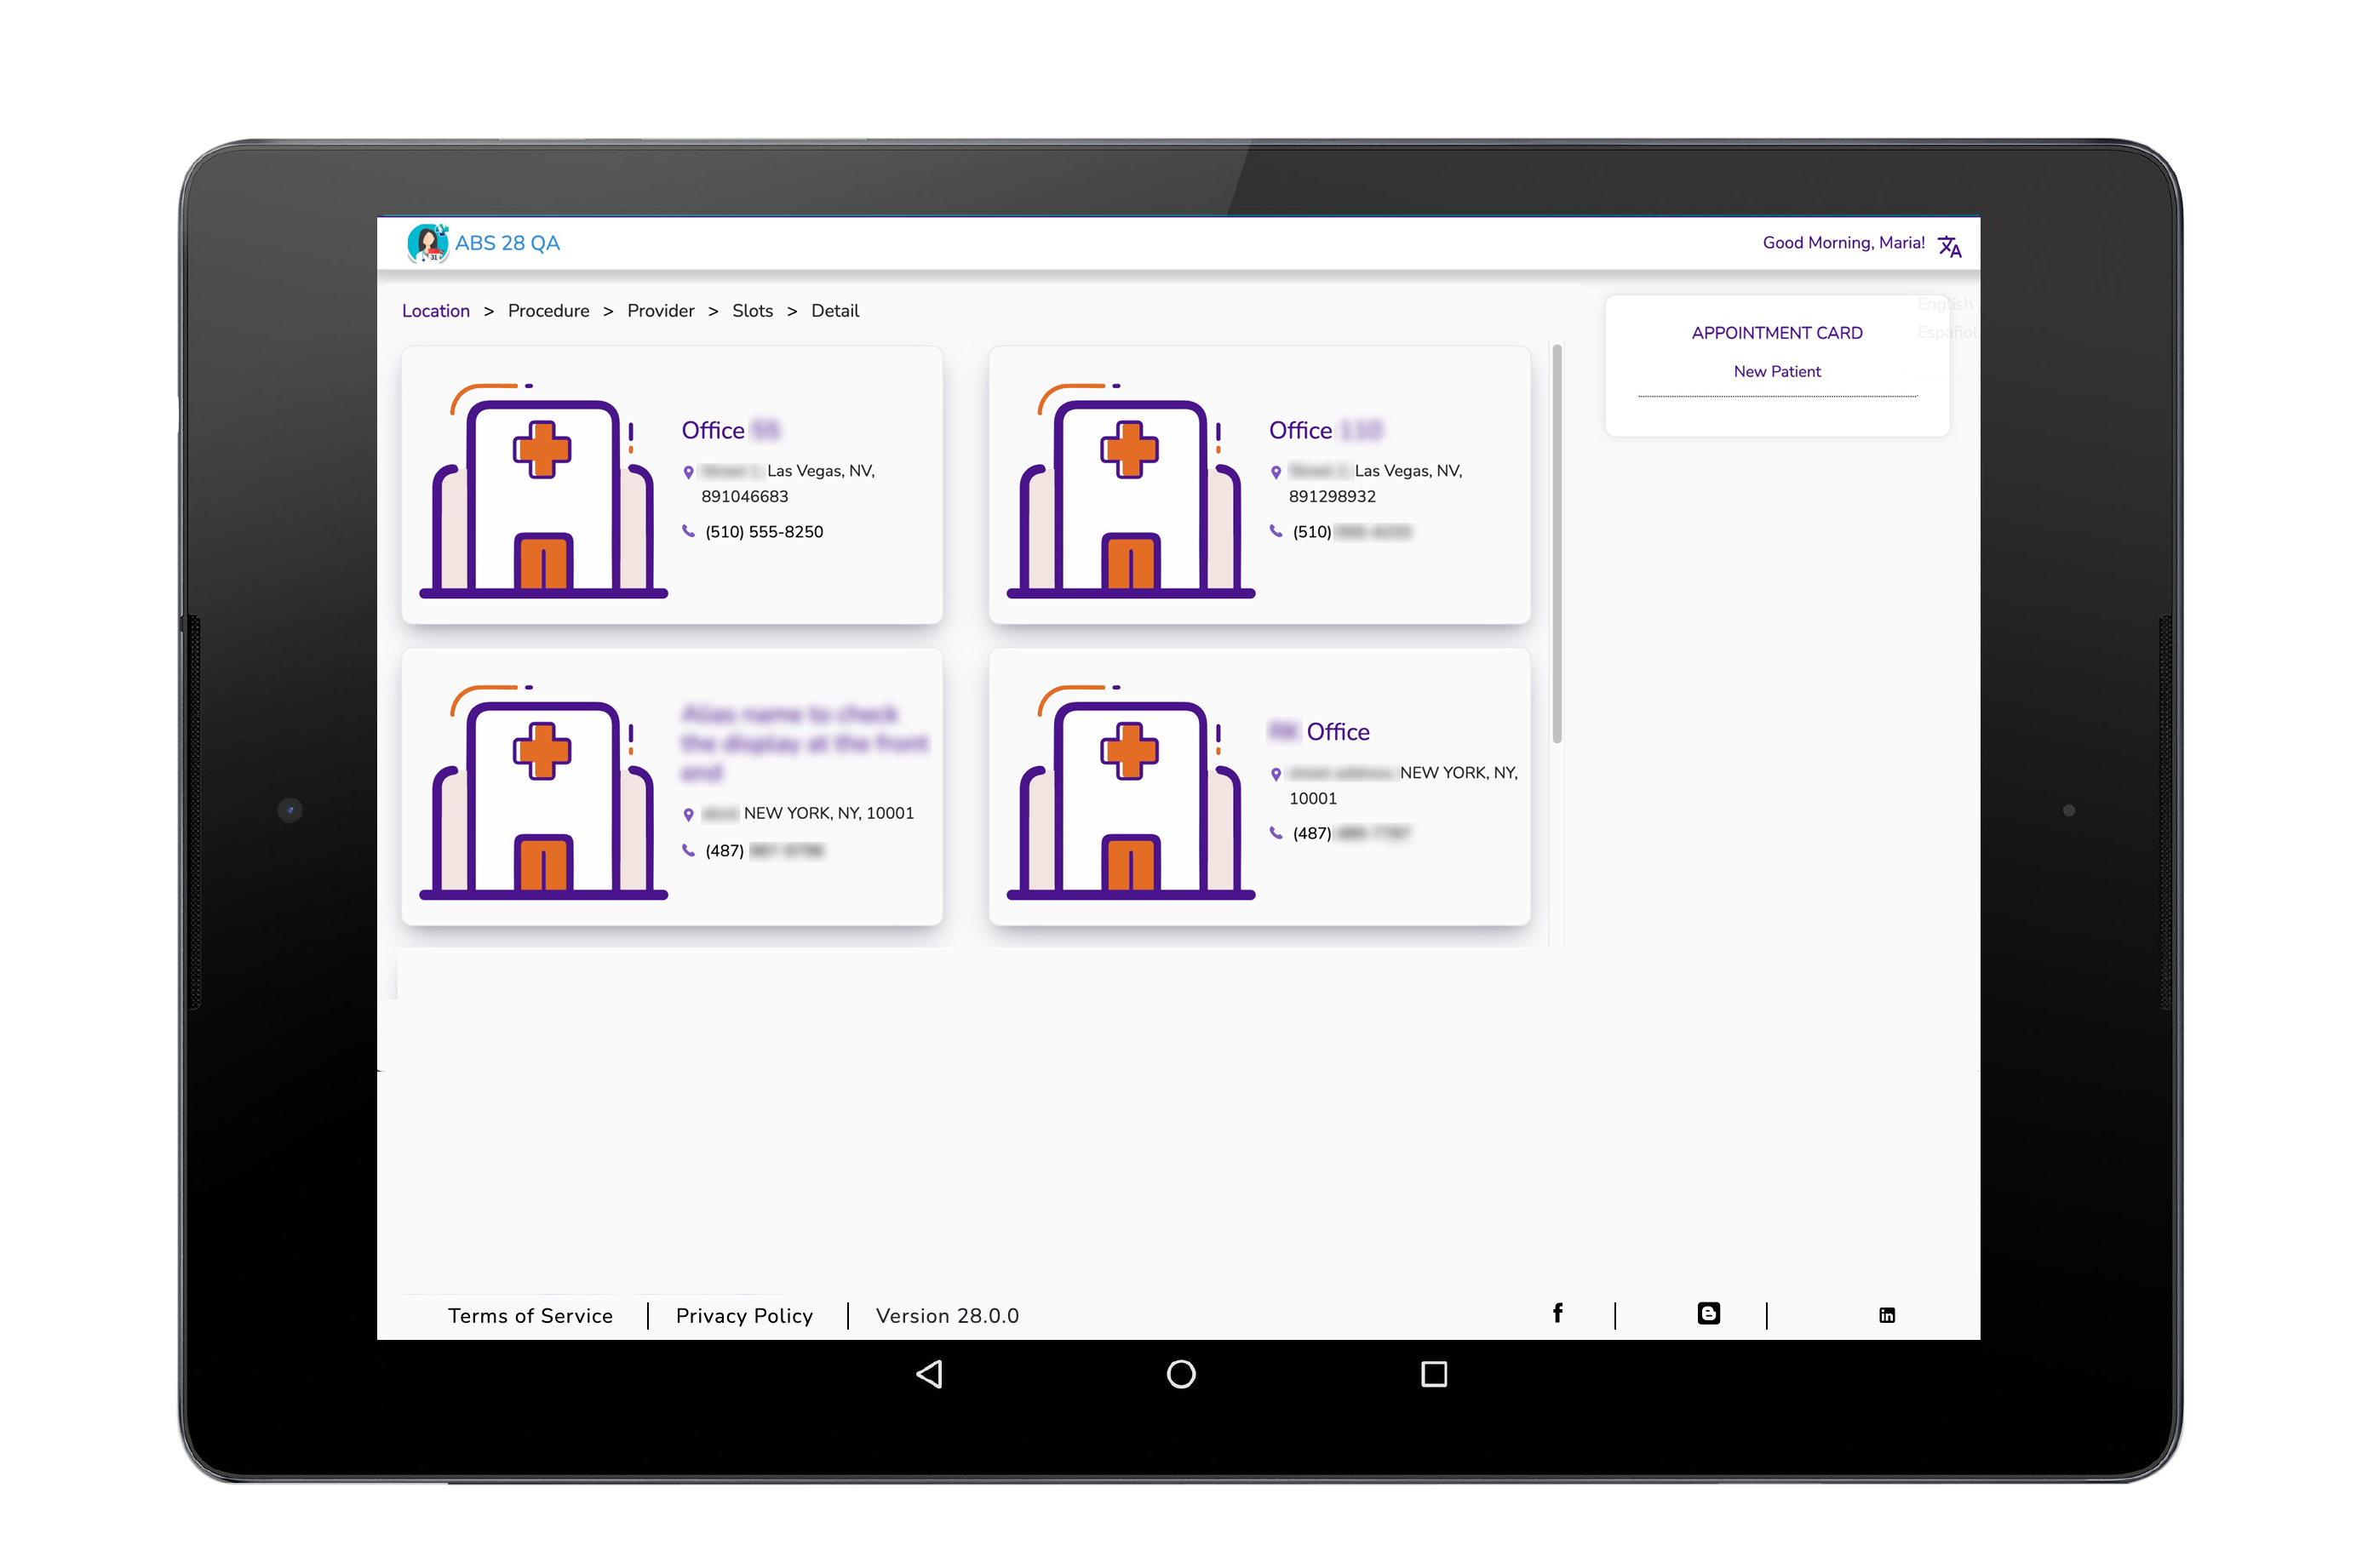
Select Location Screen
After signing in or signing up, you can now enter the necessary details of your appointment booking.
To book an appointment, follow these steps:
On the screen, do the following:
- On the Location page, search for and select the clinic.
Note: Click the clinic’s logo to view the clinic’s website.
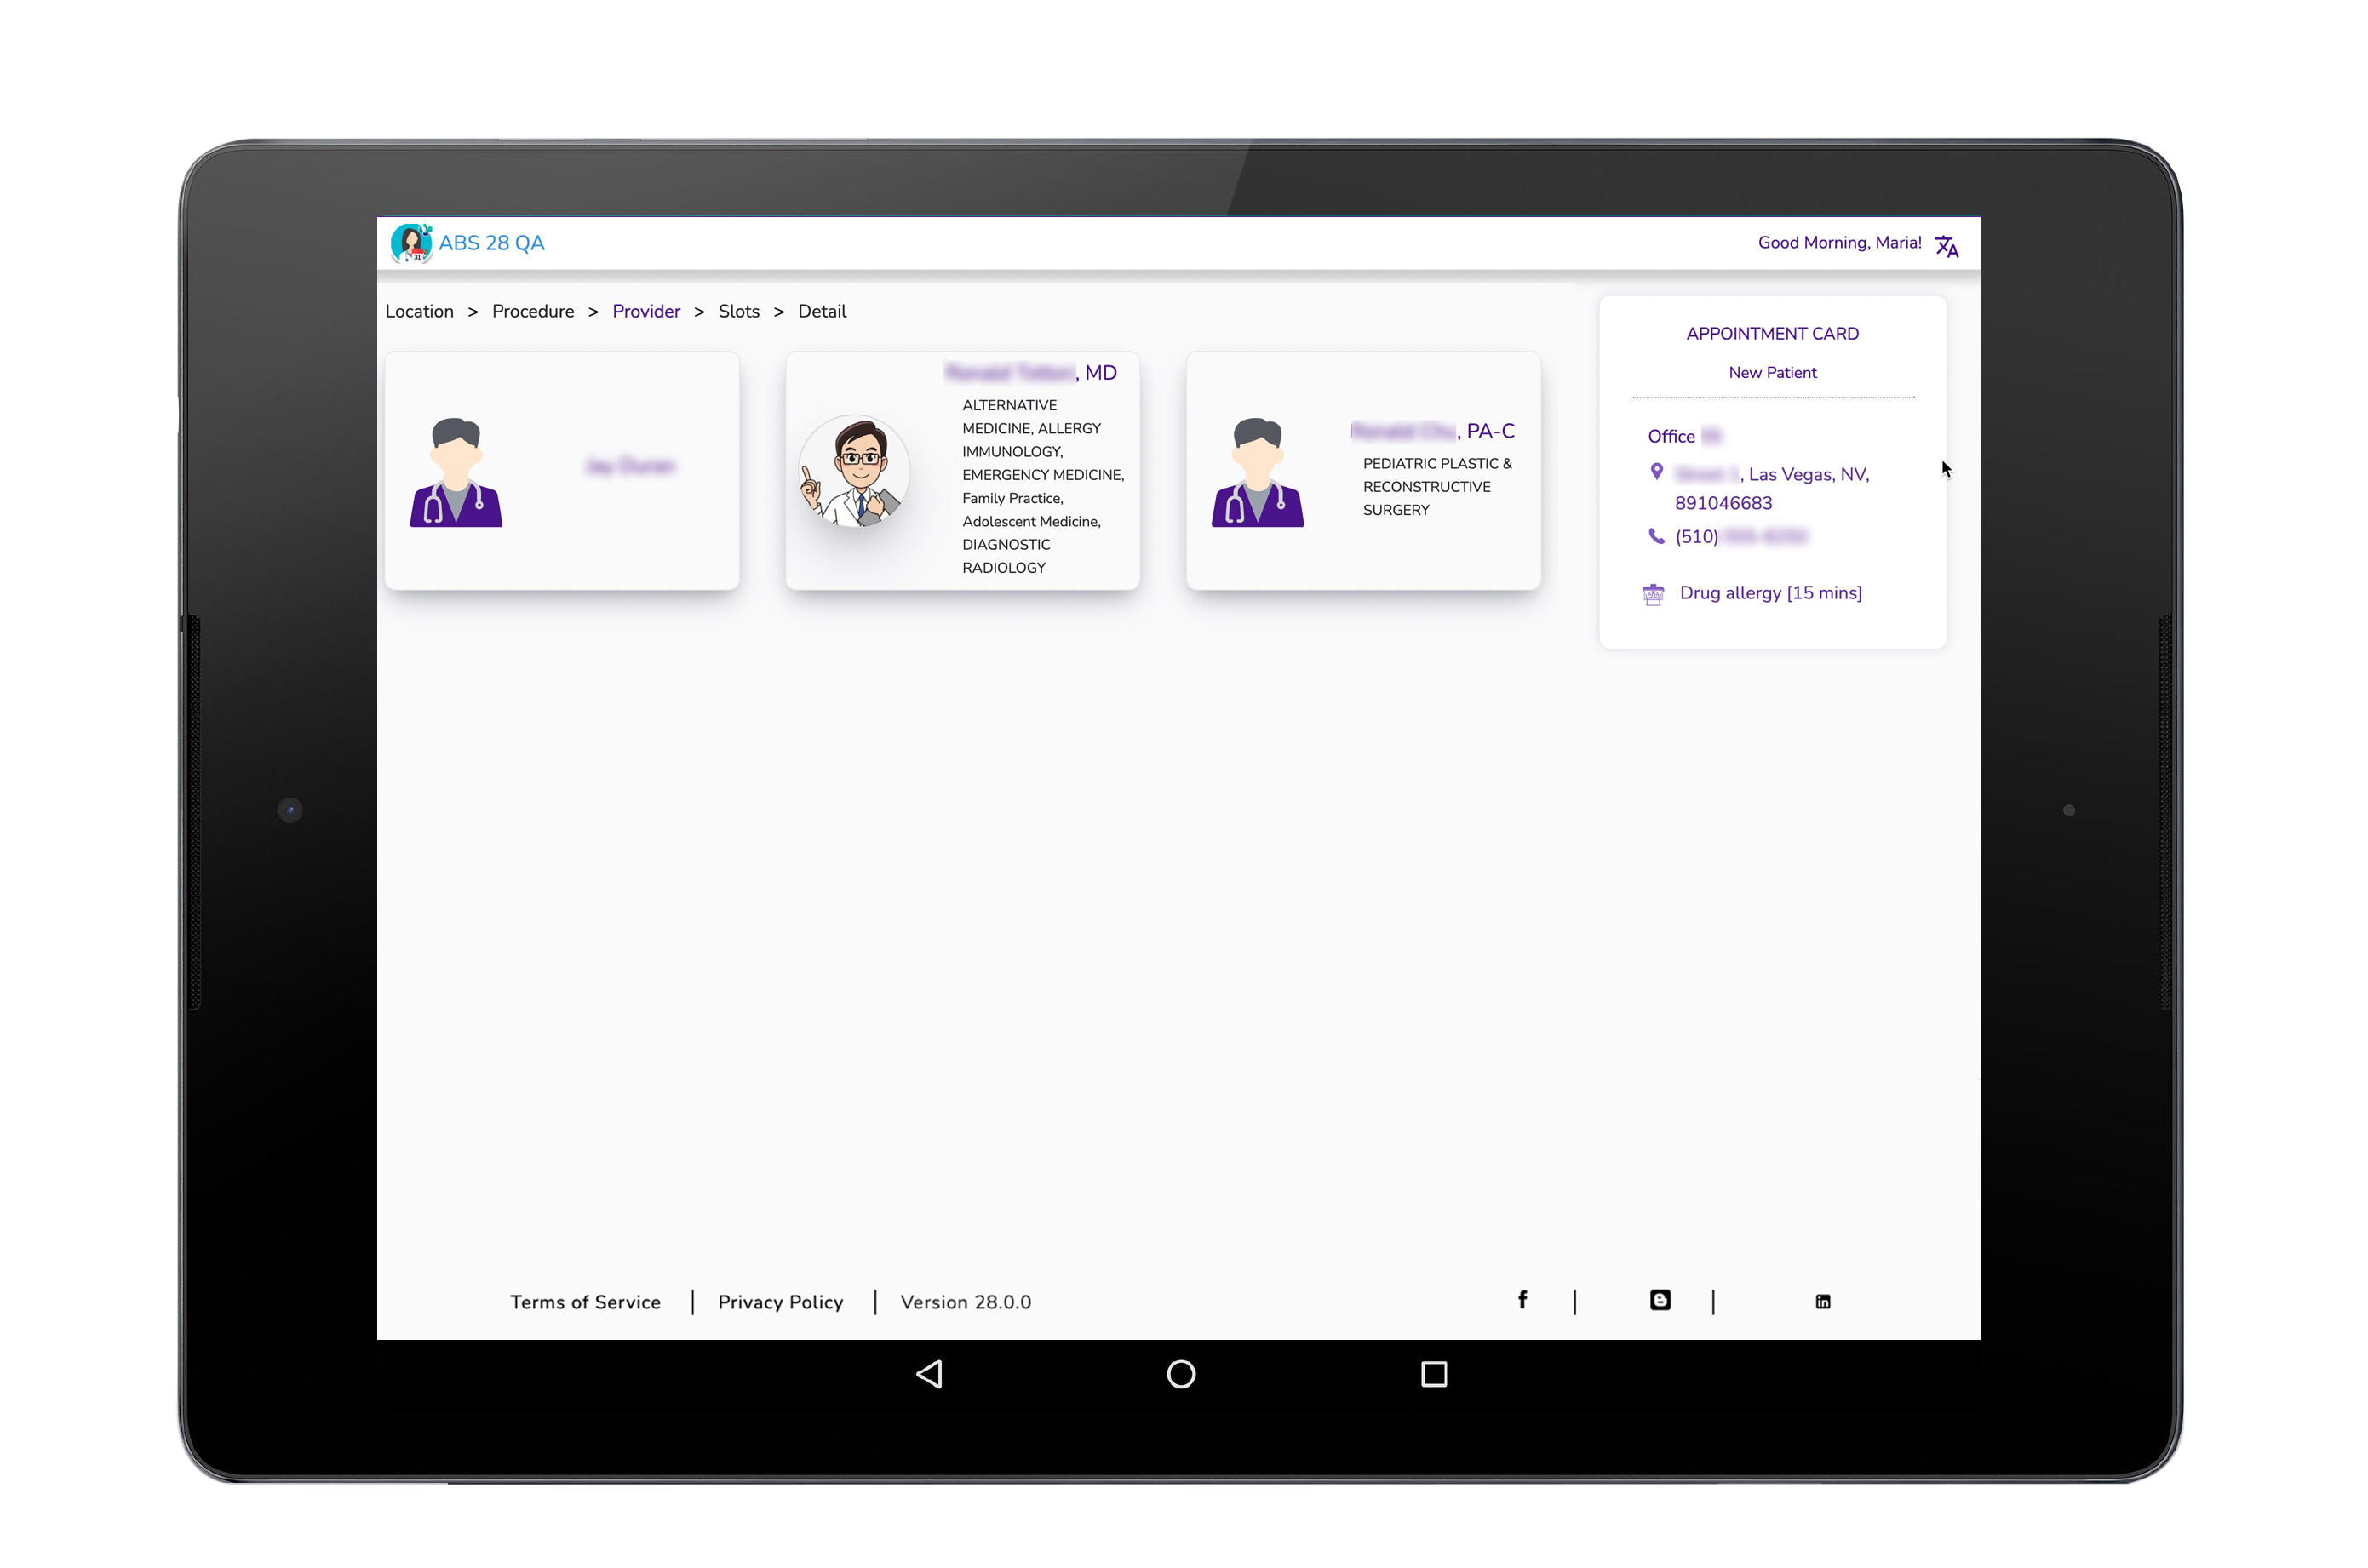
Select Provider Screen
On the Provider page, search for and select your provider.
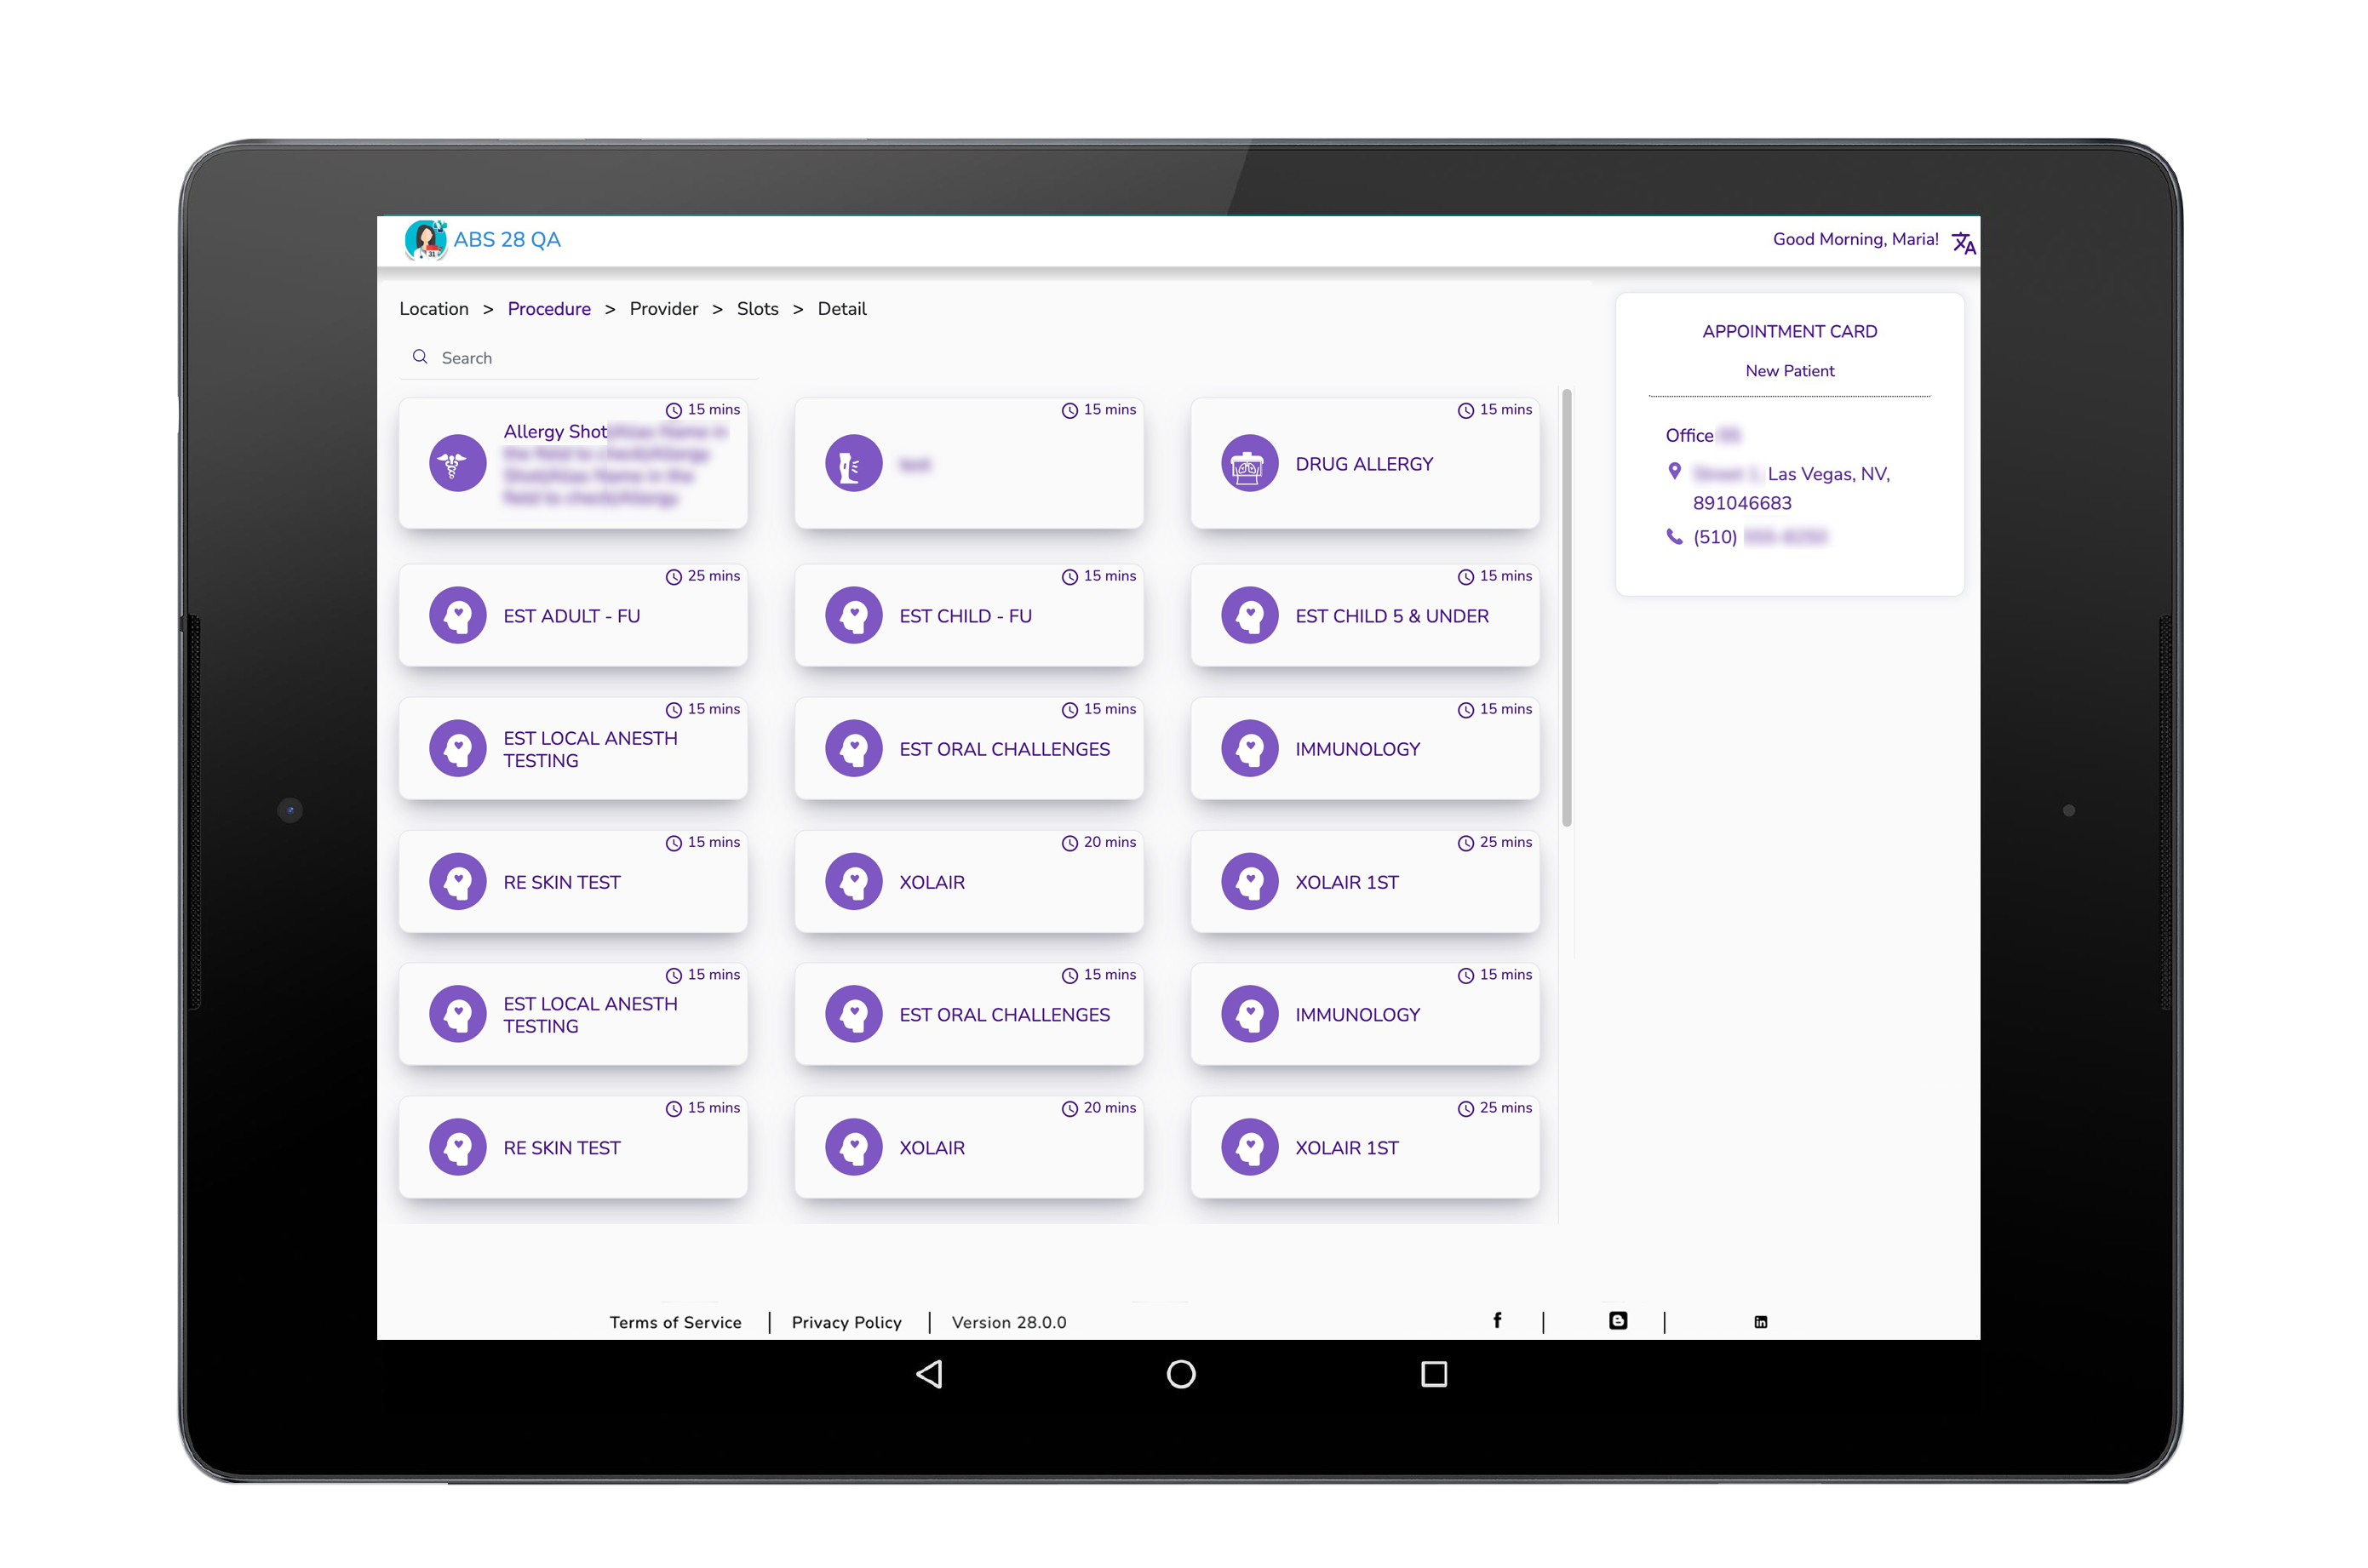
Note: If there is only one location, procedure, or provider, you will be directed to the next applicable page. You can still go back to the Location, Procedure, or Provider pages by clicking the applicable page name
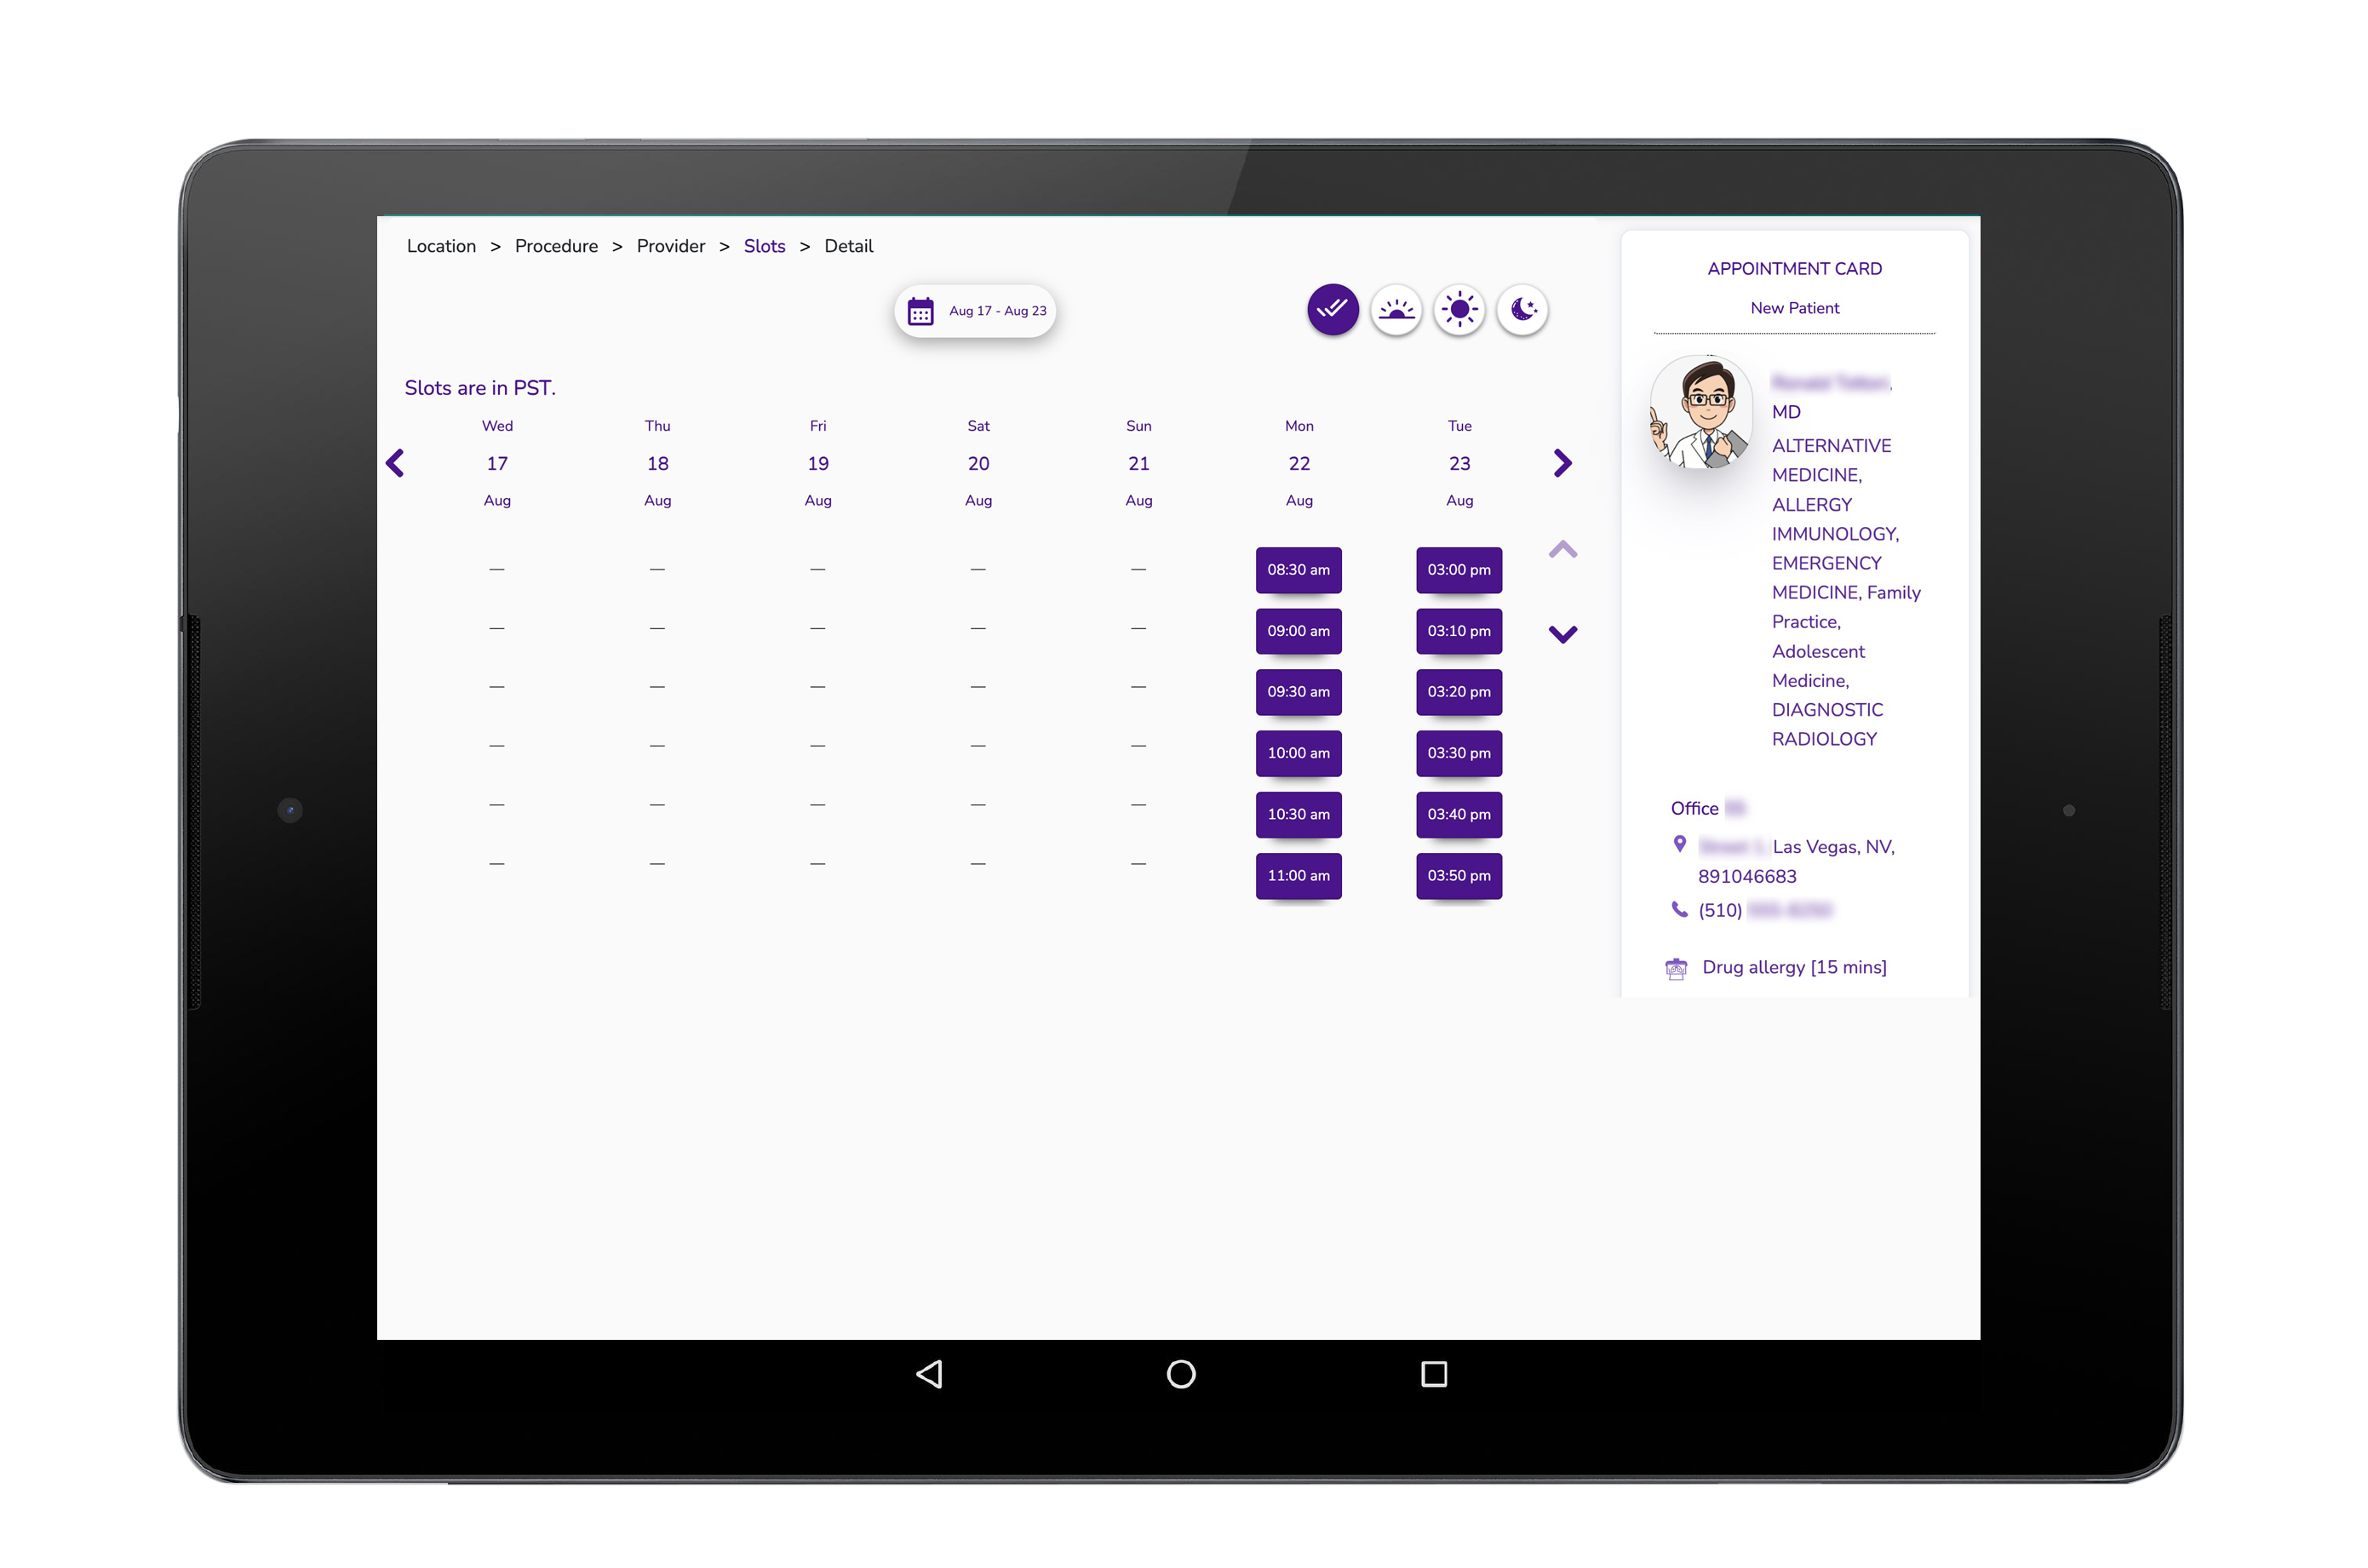
Select Time Slot Screen
On the Slots page, select the applicable date, and then select the applicable time slot of your appointment in the table.
The slot calendar displays the available time slots for the first seven days. You can click the navigation arrows or the calendar symbol to select other preferable dates. Colored dots indicate the days when the slots are available for the selected provider.
Note: To filter the time slots, click the symbols on the upper-right corner of the page. Click the All symbol (check mark) to view all time slots. Click the Morning symbol (sunrise) to view the morning time slots. Click the Afternoon symbol (high sun) to view the afternoon time slots. Click the Evening symbol (Moon) to view the evening time slots. To view the time slots for the succeeding weeks, click the right-arrow symbol. To view the time slots for the day, click the up and down arrows.
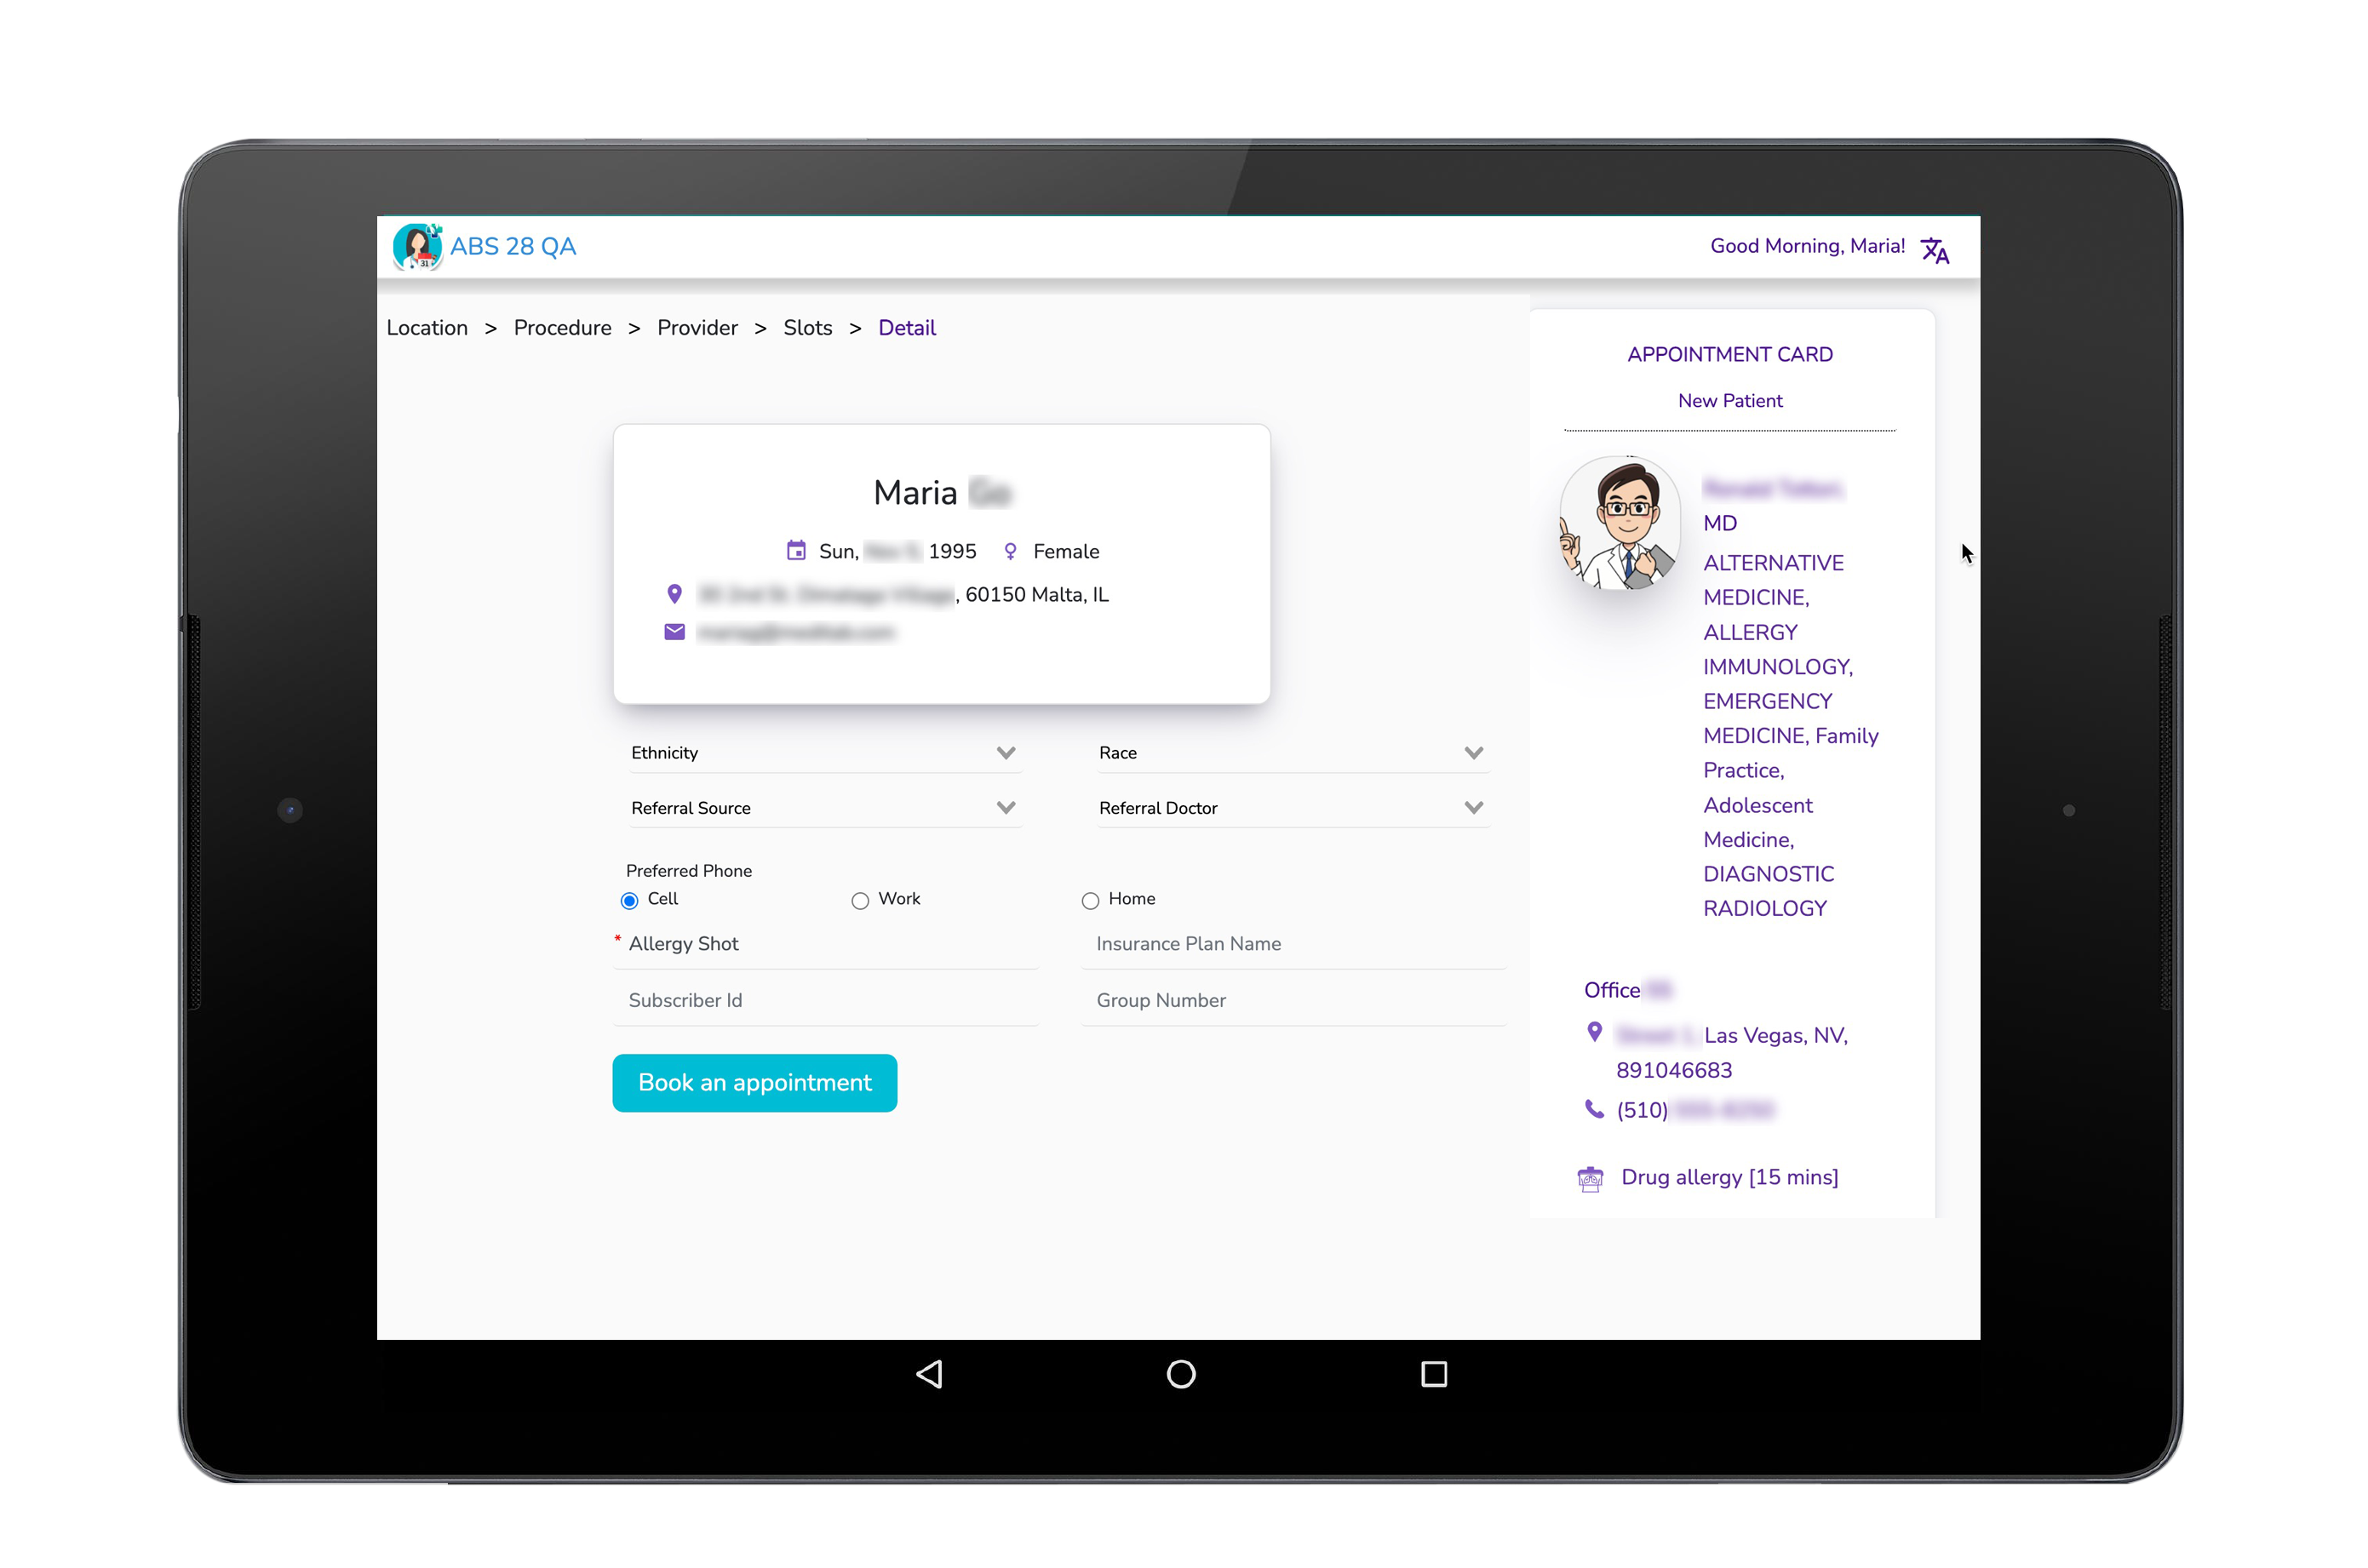
Detail Screen
On the Detail page, enter the necessary details, and then click Book an appointment.
Note: Required sections are marked with a red asterisk. New patients must fill out the required sections. For new patients, review your signup details and make sure that the information is accurate. The clinic can use and store your information for necessary processes. The Appointment Card pane on the right side of the screen displays the procedure details, such as the procedure name, location, provider, and the date and time of the appointment. To view the location of the clinic on Google Maps, click the location displayed in the Appointment Card.
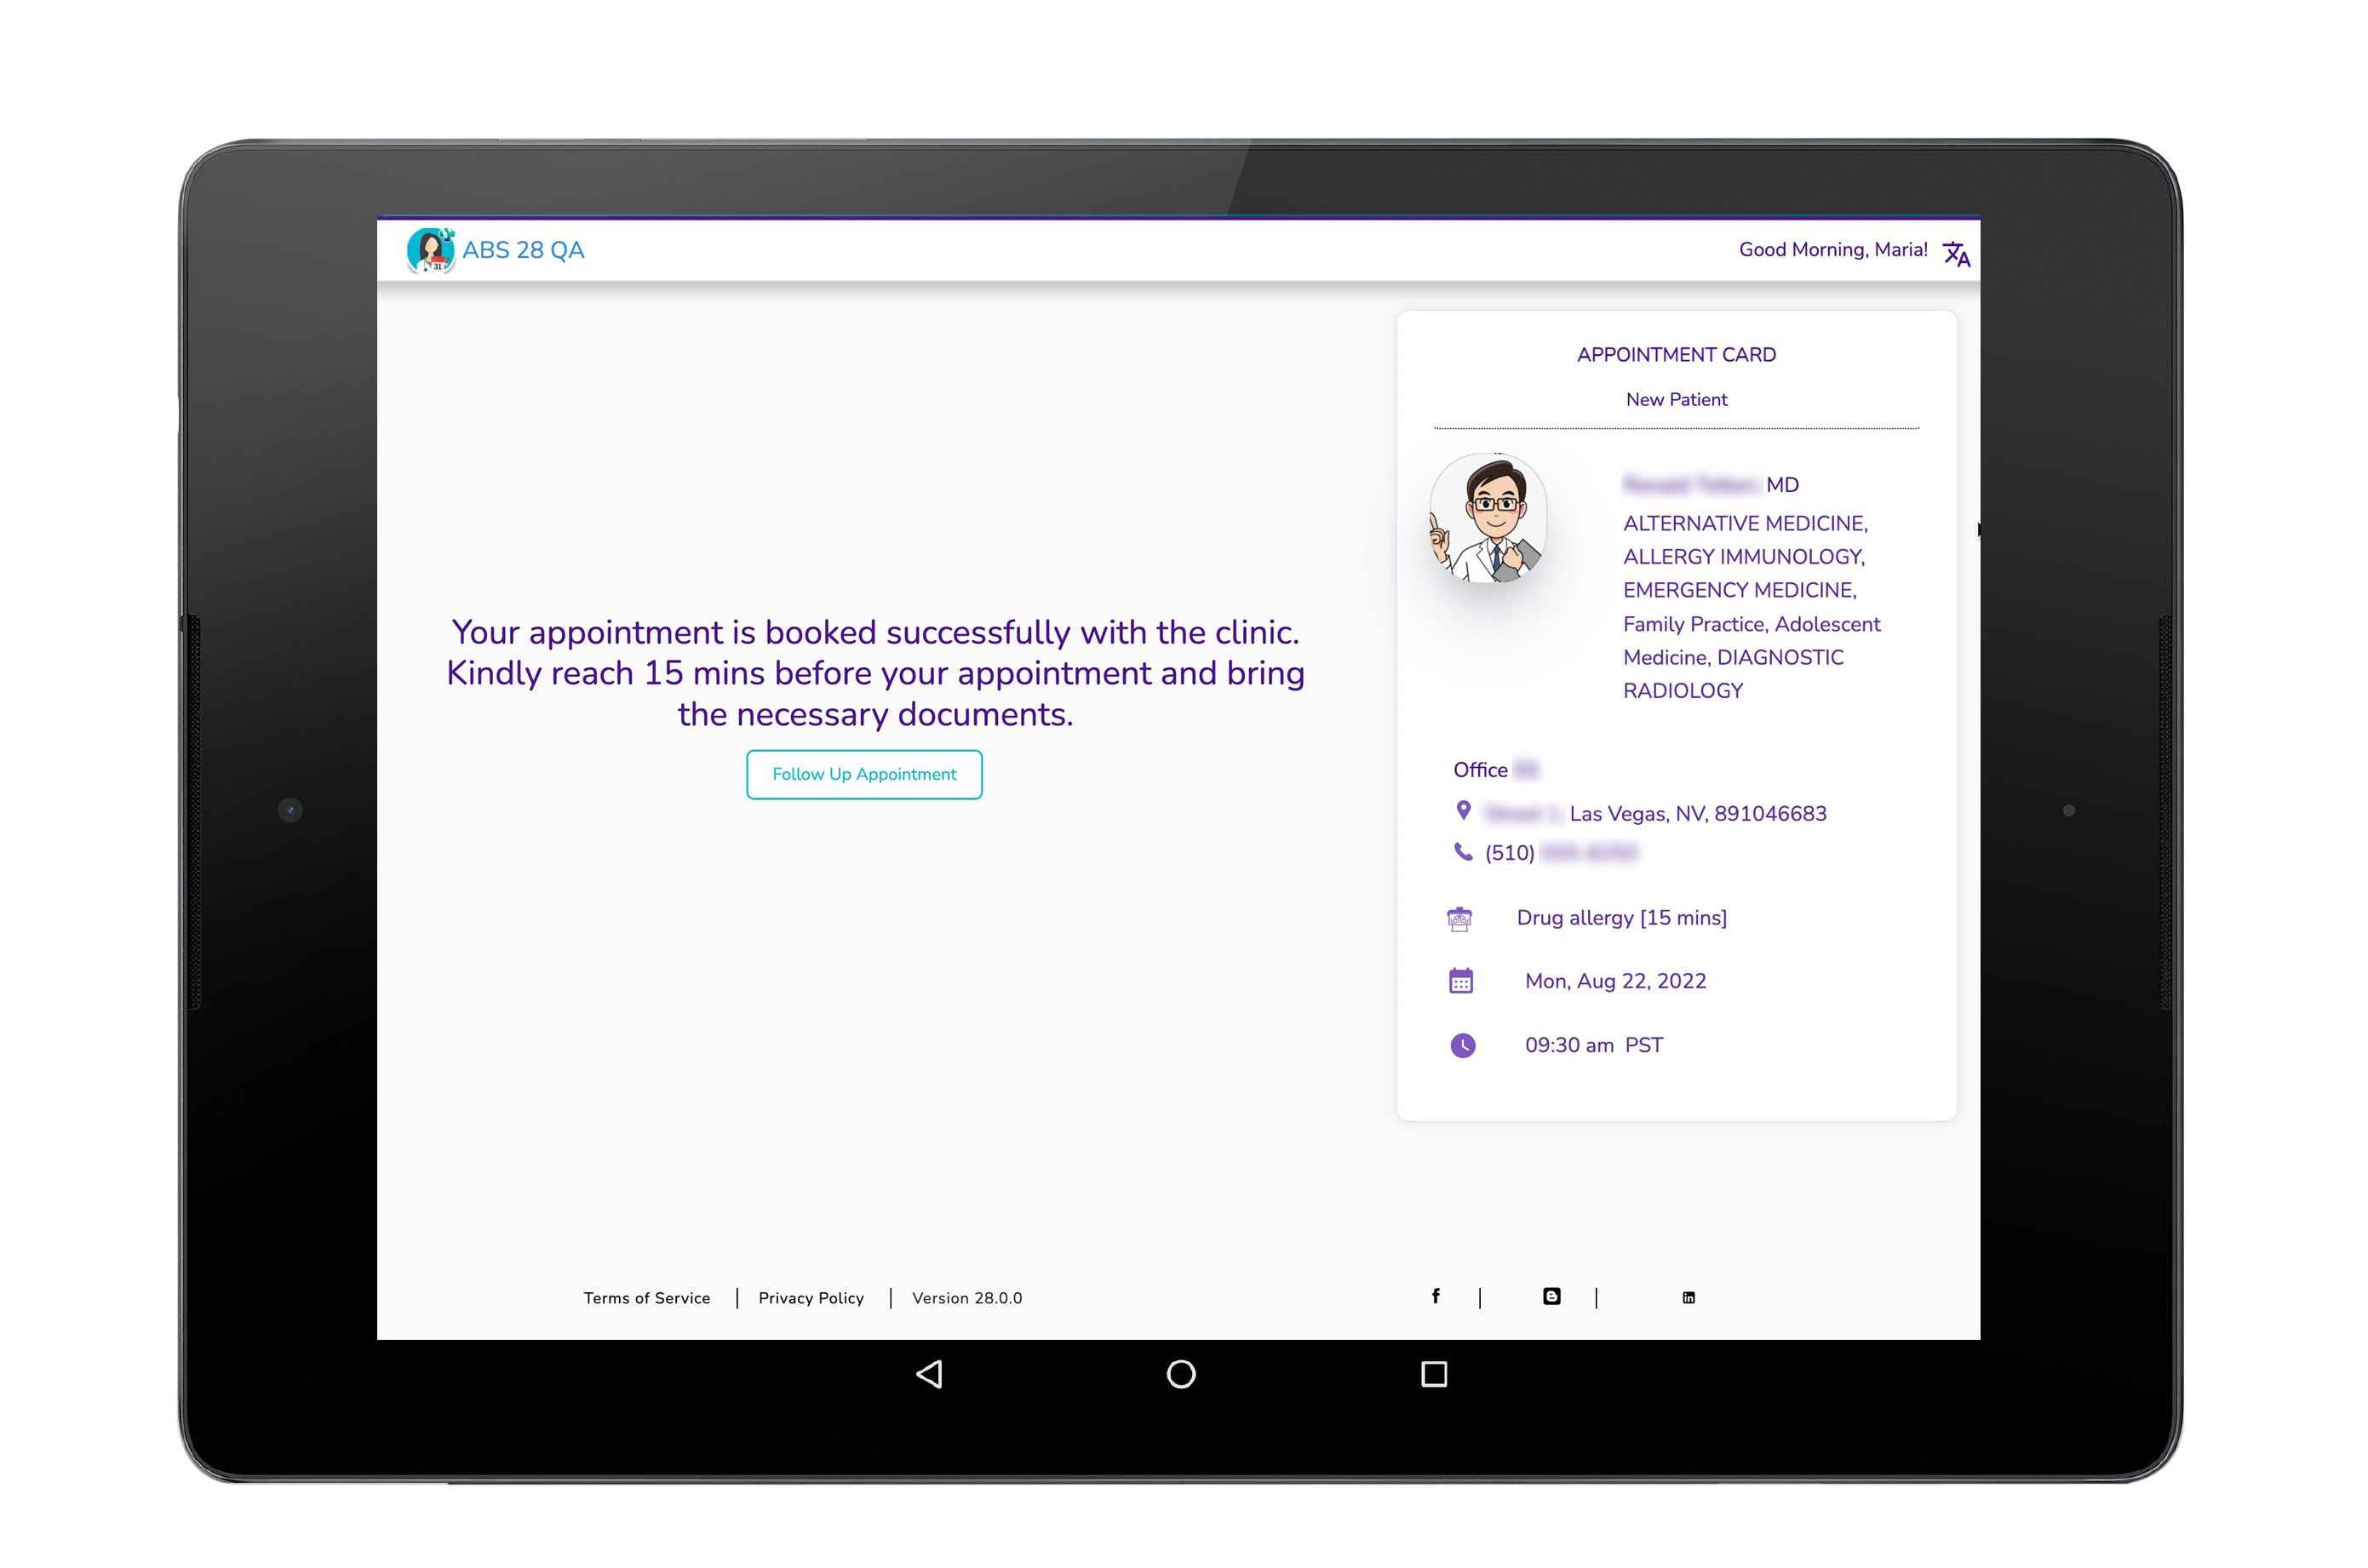
Thank You Screen
On the next screen, view the confirmation message for the successful booking
Note: Forms marked as Required do not have the Skip button. Accepted or skipped forms show the Accepted or Skipped status. If the Guardian Forms screen appears, the similar process is followed. The screen has the Patient Forms button, which returns the user to the Patient Forms screen.
